- Made to Order
- Season 1
- Episode 8
How NYC’s Best Cinnamon Buns Are Made
Released on 04/17/2025
[bright music]
Hi, I am Miro Uskokovic,
owner and executive chef at Hani's Bakery in New York City.
And today we are here to make our perfect version
of Hani's Malted Cinnamon Bun.
[bright music]
Hani's Bakery is modern American style bakery.
Oftentimes we have lines down the block
and we sell out pretty quickly.
Malted cinnamon bun is Hani's best seller.
Sometimes by the time you make it
to the front of the line, the cinnamon buns are gone.
It looks large and fluffy and moist
and has a lot of cinnamon
and like a gooey milky cream cheese glaze on top.
[bright music]
Let's do the first step.
We are making the most important part of the cinnamon bun,
so we are adding cinnamon into this bun
in the form of a schmear
where we are mixing all of these ingredients together
so it'll be easier to spread on our dough.
So we want to mix dry ingredients first,
which is our dark brown sugar.
We can most definitely use a light brown sugar,
but dark brown sugar has a higher molasses
and it means just like a little bit more of that like
toffee caramely flavor.
A lot of cinnamon and AP flour.
I'm just gonna give it a quick mix.
[mixer whirring]
Okay, so now that all of the dry ingredients
are incorporated,
we are going to mix the Lyle Cane syrup,
which is like the second British byproduct
of processing sugar.
We add butter that we just slightly melted and let it cool.
Lyle syrup will add a little bit of the chewiness
and the moisture to the schmear.
Some recipes calls for addition
of corn syrup, which is great.
I find that Lyle's or cane syrup
has that like a buttery toffee flavor
that it plays very well
with the butter and with the cinnamon.
You know it is important
that your butter is neither too hard not too soft,
but it's like this beautiful tempered creamy texture.
I'm gonna turn it back on.
And we're just gonna mix it until it comes together.
So now we're gonna slowly start adding our eggs one by one.
[upbeat music]
Okay, so our schmear is done and looks like frosting,
and that's what exactly you're looking for.
Now the schmear is ready,
we are gonna move on and we are gonna make our dough.
[bright music]
And here at Hani's we are using a brioche dough.
We are not serving our bun warm,
we are serving them usually at room temperature.
So we want to make sure
that even when they're at the room temperature,
they're still like soft and fluffy and moist.
And you can achieve that by using enrich dough like brioche
that has a good amount of butter.
First thing we are going to is scale a flour.
We are using King Arthur special patent flour blend
which has about a 13% protein content.
It really gives you a nice structure like nice chewy dough.
Now we're going to add our eggs.
We are using white granulated sugar.
It's usually the best sugar to use when making dough
because it doesn't have molasses
which can alter and affect your yeast and the rise.
Whole milk.
As we are using fresh yeast, there's also dry yeast
and there's always a little bit argument
between the pastry chefs and bakers, which one is better.
I don't really think
that there is much flavor difference honestly,
I just feel the fresh yeast is a little bit more resilient
versus the dry yeast,
which I feel is a little bit more temperature sensitive.
So we're gonna mix our dough right now,
and we are holding off on adding salt and butter.
Salt will tighten the dough,
also affect the yeast as well,
and the butter will affect the formation of gluten.
So we're gonna first develop the structure
before we add those two ingredients.
So our dough is mixing right now,
it's gonna take about 10 to 15 minutes.
There are two different kinds of mixers.
There's the planetarium mixer,
which is kinda like an old purpose, can do doughs,
can do cakes, can do cookies.
But there's also something called a spiral mixer
or dough mixer, which is specifically designed
to make only dough,
and mixes the dough faster
and prevents dough from overheating
which can affect the yeast, and gluten formation,
as well as the texture.
Here we do not have that
because you know Hani's Bakery specializes
in multiple things, not just the dough.
That's why we are using a fresh yeast
because it's more resilient.
But we are also chilling our ingredients
for at least 30 minutes to an hour
and that will prevent the dough from overheating
and affecting the texture.
So in order to check the strength of our dough
and gluten formation,
we're going to do a window pane effect check,
which means we're gonna just stretch
a little piece of dough in between our fingers
and just see how elastic it is,
and you know it's taking a while to tear,
so that's a great thing.
We are going to add salt, butter.
We are now just gonna have this thing going for
next 10 to 15 minutes.
Our dough looks ready, it is pulling from the side.
Also looks nice, elastic and shiny.
So we're just gonna take it out of a mixer.
It is important to either put it on a silpad,
which is like non-stick pan liner,
or you can align your tray with a plastic rest spray
with a little bit of PAM spray,
and then just put your dough on there.
We are going to cover it with more plastic wrap
and we are going to bulk ferment this dough,
which means we're going to leave it in a bulk as it is
to sit at a room temperature
for about like an hour two.
This is where the flavor is gonna be built, the structure,
you know it's going to like double or triple on volume.
Okay, so it's been an hour
and you can see a difference in a dough.
It has risen, nearly doubled in volume.
Removing these gasses that have built up
during the bulk fermentation
is going to allow us to get rid of those like big bubbles
and create more like finer brioche dough.
Okay, so now that we have tightly wrapped this,
we're going to put it in a walk-in to sit overnight.
It's gonna build the flavor
but it's also going to build the structure
and it's gonna firm up
so it's easier for us to sheet it when the time comes.
[bright music]
Okay, here is our dough that's been sitting
for about 12 hours.
Nice and chill.
So it's gonna be much more easier for us to sheet it.
So this is a commercial sheeter,
somebody calls it a roller.
What this is doing
is just essentially sheeting out the dough
to the thickens that you want.
At home you would just use a rolling pin.
If you go higher number, the dough is going to be thick
so you're not gonna have like
visually those beautiful spirals
that you would if you go thinner.
Also, if you go too thin it might end up being too tough
and like too much schmear and become like moist and gooey.
Now that we have finished sheeting our dough,
we are going to put it in a freezer
for at least an hour so it firms up.
So the shmear and rolling part is easier for us to achieve.
[bright music]
Our sheet of dough has chilled
so now we are going to apply our schmear.
Just wanna spread it in like nice
and even amount all around.
And that's it.
And now we're gonna start rolling it.
So always the beginning is a little bit harder,
especially if your dough gets soft
and starts sticking to the parchment paper,
but after that initial roll it just gets easier.
You wanna roll it tight, not too tight,
you wanna make sure that there's enough room to expand.
And we're gonna put it in a freezer
for a few hours
until it is practically frozen,
and that's gonna allow us
for like easier slicing and a better shape.
So we are using this like a handy tool
that a lot of bakers and pastry chef use,
which is called a bicycle cutter.
But we are just using it for scoring.
If you do not have a bicycle cutter score,
you just use a ruler, just bit old fashioned rulers.
It's very important that all of your cinnamon buns
are uniform so they are baking at an even rate
and also you wanna ensure
that every customer gets the same size.
So now that I've marked my buns,
I just use good old knife.
And this is why freezing is essential
because it cuts easier and cleaner.
So we like to bake them in individual molds
rather than baking them together
just to make sure they're all even,
you can most definitely bake them in 13 by nine inch pan.
Some people really love the like super like gooey
and like soft middle of the cinnamon bun bake.
So we're using these plexiglass molds from Matfer.
and you want to use something that has the bottom
so that it catches all the goeyness
and schmear that could potentially leach on the bottom.
These are non-stick.
I'm gonna cover them with a plastic wrap.
We will put in a mold while it's still frozen
and then around 9:00 PM every night
we will pull those frozen buns in a mold
and let 'em sit at room temperature at about 70 degrees.
So they will slowly defrost and proof.
So by the time the first team is in at 5:00 AM
they'll be ready to go in in the oven.
We're gonna take these trays in our kitchen
and then we're gonna put it in a speed rack
and let it proof.
Our buns are ready.
The way to check is we just wanna like slightly press it.
If it's like bouncing back slowly with like a little indent,
that means that it is ready.
We are using Rational iCombi oven.
So you can either like cook with a hot air,
or you can steam, or you can do both.
And it really gives us a beautiful puff rise,
makes like a nice crust that it's not too crusty,
it's nice and soft,
and also keeps the buns super moist.
You can most definitely
just like use your regular home oven,
which is just a dry heat.
Sure you can like spray a little bit of water
or like add a little bit of water on the bottom
to try to mimic the Combi oven,
but you know, if you're just baking it
at the regular hot air,
it won't be as moist and fluffy
and it might create like a thicker crust,
which again will prevent it from rising and fluffing up.
[bright music]
And now buns are done.
We're gonna let it cool down for a little bit
before we apply the malted glaze on top.
[bright music]
Next step I feel is probably
the everybody's most favorite part of the cinnamon bun
and that is the glaze on top.
I usually find like two types of glaze
that most people use,
either it's cream cheese frosting,
which is kinda like thick and fluffy,
or it's like a runny, sugary glaze
and we wanted to kinda combine both.
So we're just using good old Philadelphia cream cheese,
full fat always.
And we are gonna paddle this just a little bit
to make it creamy.
So we are adding powder sugar.
Okay, so at this point
we practically have a cream cheese frosting.
You know, we can just like rip this further
until like it's light and fluffy.
But as I mentioned earlier,
we wanna make it a little bit like looser
and gooey and anxious.
So we're gonna continue to add some other ingredients.
And we're just using regular kosher salt
so the salt will kind of help balance that sweetness.
A little bit of vanilla extract.
I'm a huge fan of malted milk powder
or just like malt flavor in general,
which kind of gives it that like barley toffee,
buttery, slightly caramely flavor.
If you're not familiar with malted milk powder,
sometimes it's also called ovaltine.
It's essentially dry milk that has barley malt added to it
for I guess extra nutrition, but also extra flavor as well.
Malted milk powder is really what makes our glaze special.
We have a little touch of nutmeg there
just to kind of amp up
and kind of tie all those flavors together.
The last ingredient we're gonna add
is just a whole milk,
that's gonna give it like a little bit of the richness,
but also a beautiful sheen to the glaze.
So we make the glaze usually a day before
just to allow for the malted milk powder to hydrate
and melt into a glaze.
And we wanna mix it until everything is like creamy,
homogenous and there are no like lumps.
Okay, so this is done.
We're gonna let this rest overnight,
but we already made some yesterday.
So we are gonna continue with our next step.
[bright music]
This is the most exciting part,
which is glazing our buns.
But we're gonna first take them out of the molds
and put 'em directly on deli paper
because we wanna make sure
that all of the sticky glaze is contained.
We are using just a cookie scoop
to put our glaze on top,
again to make sure that it's nice and consistent.
Use back of the scoop just to spread it around
and let it kind of drape and fall down.
This is almost four ounces of glaze on top.
What we were looking for at the end
when it came to glaze
is just again, that there is like a generous amount of it
that you can get it in every single bite,
but also we wanted it to be like nice and shiny
and also sticky.
We didn't want it to like get like fully,
like hard like a frosting.
We wanted to like maintain it like a goeyness
even if you take it home
and eat it like two, three hours later.
And if you do take it home to eat it later,
we do suggest pop it in the microwave for like 10 seconds
and it brings it to really next level.
We are finally here.
Our malted cinnamon bun is ready, so let's try it.
[bright music]
You know, unless you need wet towels
after eating cinnamon buns, did you really eat cinnamon bun?
It's super soft, super fluffy, moist,
and glaze is gooey and anxious.
The cinnamon is like super strong and spicy
and like coming through despite all of the glaze.
In my opinion, this is perfect cinnamon bun.
And there's a reason why people stand in line.
[bright music]

How One of NYC's Best Italian Chefs Makes Chicken Parmesan

How One of NYC's Best Chinese Chefs Makes Fried Rice

How One of NYC’s Best Indian Chefs Makes Biryani

How a Master Italian Chef Makes Ragu

People Wait 3 Hours for NYC's Best Pancakes

How One of NYC’s Best Bakeries Makes Focaccia

How NYC's Best Lasagna is Made
How NYC’s Best Cinnamon Buns Are Made

How NYC’s Best French Chef Makes Salmon (3 Michelin Star)

How One of NYC’s Best Chefs Makes Steak Au Poivre (Michelin Star)
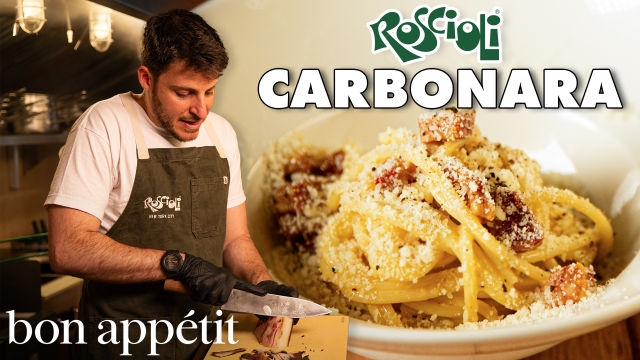
How The Best Carbonara in NYC is Made
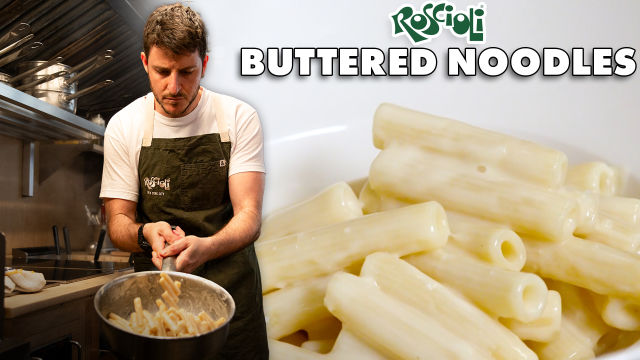
How The World’s Best Buttered Noodles Are Made